Setup Custom Domain in Blogger
Hi All, in today’s article ill show you how to add a custom domain to Blogger. if you want to Setup custom domain in blogger, then read full step by step article also at the bottom, add live video demo. To continue with us and learn how to add a domain in blogger, if you guys want to buy .com domain at a cheap price (0.88$) then Click here.
Let’s Start, Just log in to your Blogger account. after redirection of your dashboard just click the left sidebar Setting tab.
How to Get Fully Approved Google Adsense Account [Trick 2020]
How to Convert hosted account to non-hosted account
Best Way to Get High-Quality Backlinks For Website or Blog in 2020
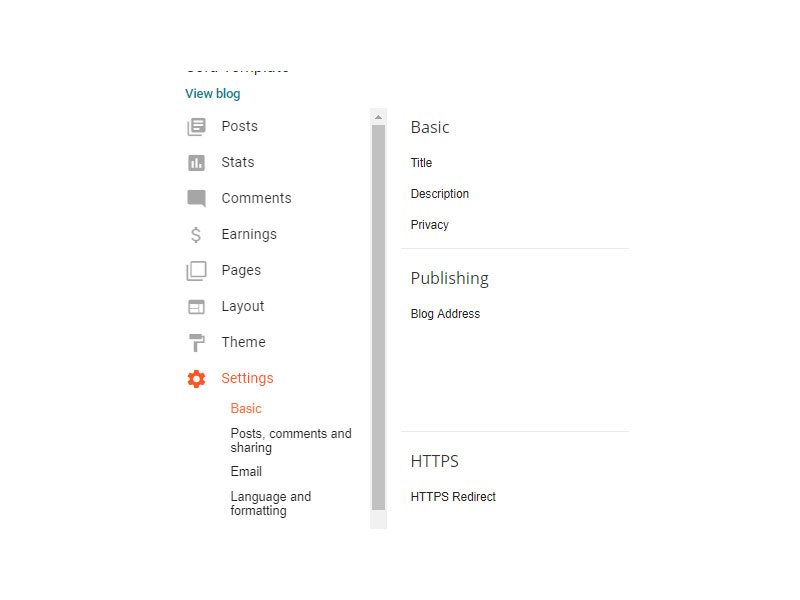
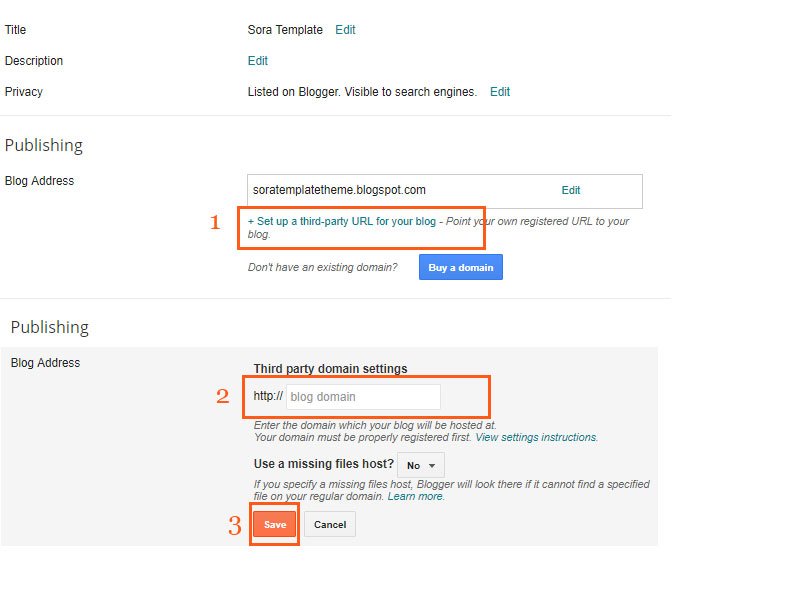
Now First you click on the setting menu, after that Publishing section you see your blogger URL. At the just down, you see one link (+ Set up a third-party URL for your blog) Just click on that. As shown in the image. When you click on this link you see one input box appear there. where you have to enter your custom domain name. After entering your domain just click on the Save button.
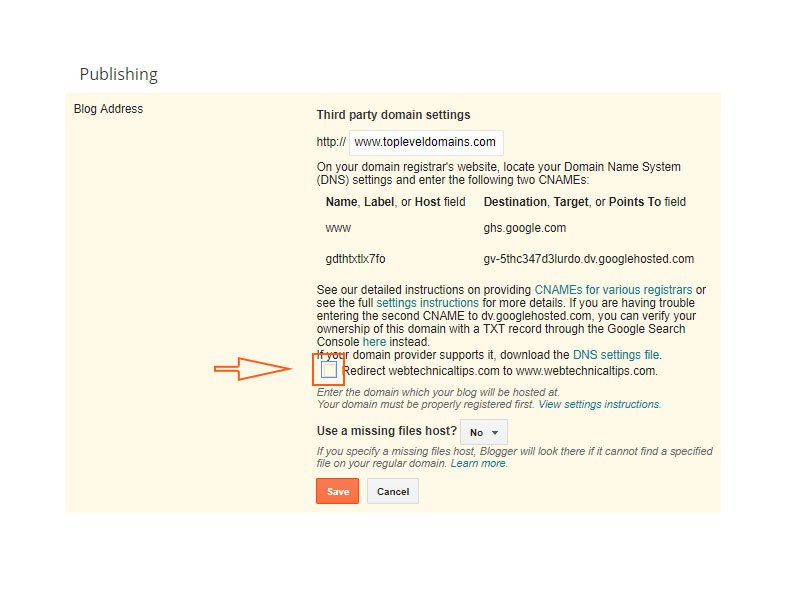
Now you see some error appear here. you have to copy that CNAME and add to your Domain DNS. for more clarification just watch below the video.
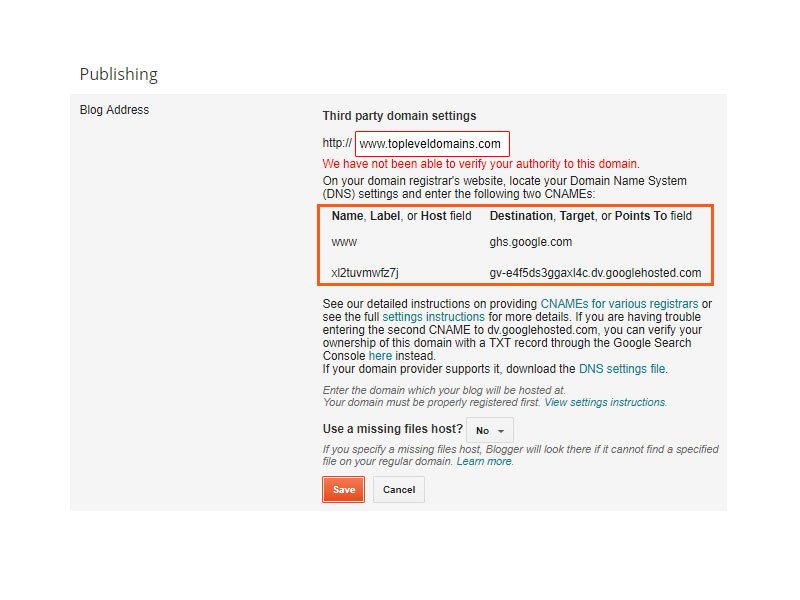
Now you goto your domain panel, mostly all domain providers have the same option to add or remove CNAME. Just log in to your service provider account and add blogger CNAME to Domain DNS. When you do this process then again go to the blogger dashboard and click save button. If you enter Blogger CNAME Correctly to domain settings then you see your custom domain add to your blogger.
Also Read: Free Web Hosting for WordPress
But wait still, your custom domain is not set up properly, you have to do some changes in settings. now just click on Edit Button Just parlor to your custom domain. once you click on it you see one Checkbox for redirection purpose. just tick this box and click on the Save button. now your domain configures properly.
After that, you change one more setting. just below the publishing section, you see the HTTPS section. Now here you have to choose the yes option in both areas. After the selection of a first Yes option, you have to wait for some time and refresh the page. now select the second yes option. After doing this setting your SSL is Activated. now you enjoy Setup Custom domain in blogger account. your lifetime free hosting with free SSL is Activated now. Enjoy this service and share this information with your friends.

Complete Guide to Setup a Custom Domain with a Blogger
Live Video Demo
How to Use WhatsApp Without Phone Number or Sim Card
I hope you like this article and learn how to add a custom domain to blogger Namecheap. if you have any doubt or suggestion then comment on me. ill revert you ASAP. Thanks, for your time, have a nice day:)

Its very good that we can create custom domain on blogger. I feel most of are will unaware from this, they know how to use blogger or create blogspot domain but how to setup custom domain dont know.
Here you step by step clear everything.
Https issue faced previously as you mention, means I know where i was stuck.
Thanks For visit in our blog, if you face any issue in HTTPS Setting then you can watch my video. already add in my article. where i show how to activate HTTPS in Blogger. Have a Nice Day 🙂
https://youtu.be/1mSi5CUKkjQ